PhotobucketPhotobucketPhotobucketPhotobucketPhotobucket
Showing posts with label tutorials. Show all posts

How to Highlight for a Natural Glow + an Airbrush Tutorial

Recently I had the opportunity to try out TEMPTU's airbrush system and I am completely obsessed. It gives such a natural even coverage to create that flawless photo finish look. Today I am excited to share with you guys a make up tutorial using highlights to create a "natural glow". I was inspired by Phillip Lim's iridescent texture at this S/S Runway show where he created the perfect translucent glow.
Today I am going to try and recreate some of my favorite elements from the look using an iridescent highlighter. To start you will want to pick a highlighter that is 1-2 shades lighter than your natural color. I choose TEMPTU's AIRpod Highlighter in Champagne. It is pretty light but I love the soft shimmer in the hue. 

STEP 1: Lower Power
After you have applied your foundation and blush drop the power on the TEMPTU system to 2 or 3 o'clock. You will be applying the highlighter about 1 to 2 inches from your face, so you want the lower pressure so it doesn't get blotchy

Step 2: Highlight
You will be highlighting five areas on your face to create definition and glow:
* Brows: Highlight below the brow bone along the hairs of your brow
* Corner of your Eye: Apply a small centimeter circle in the inner corners of your eye to attract light to your eyes
* Bridge of your Nose: Depending on the shape of your nose, will determine the width of the highlight. If you have a wider nose apply a thin straight line down the center of your bridge to slim the width. If you have a slim nose apply a wider highlight to exaggerate the width. 
* Cheeks: Cheeks can be a 3 step process. After you have applied blush to the rose of your cheek, highlight above your blush from the rose to the outer corner of your eye almost creating a semi circle. If you want to accentuate the bone more and create depth apply a bronzer below the blush in the shadow of your cheek bone. 
* Lips: We all love the look of a soft plump lip! Highlight around the outer rim on your lips before you apply liner and this will create light and volume. You can also apply a splash of highlight to the center of your bottom lip to create additional plumpness. 
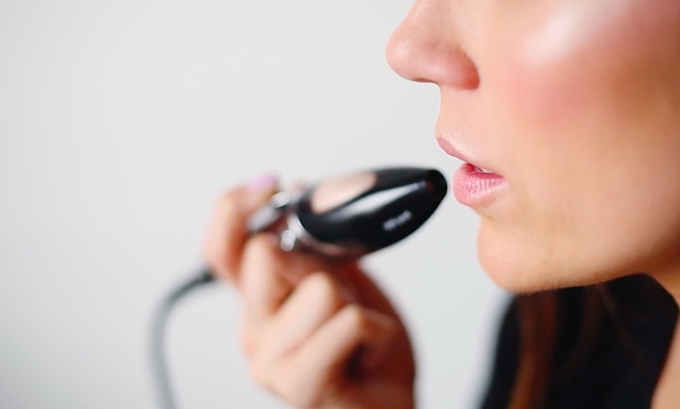
Step 3: Tada you are done! 
The highlights will emphasize your features for a natural glow. 
Do you TEMPTU? The TEMPTU airbrush system really makes highlighting so much easier and more professional looking. Right now you can click here to get a special discount on the starter kit.  

Below is a basic breakdown on where to highlight:
For a more thorough tutorial on using the TEMPTU Airbrush System to create highlights see my how to video below:
[Video: Thanks to Tribe Federation]

If you have any questions feel free to leave a comment and I'm happy to answer :)

Be sure to vote for my look on Fashion Indie for a chance to win an all expense paid trip to NYC for the ultimate beauty make-over. 

Thanks for your support! 

XOX, 
Christine

Breezy Flow + Scarf Head Wrap Tutorial


Ruffled Maxi Dress (old similar herehere) / Splendid Jersey Cardigan / ILY Crystal Necklace / Gigi New York Clutch c/o / Karen Walker Sunglasses


I have had quite a few emails and comments asking how I tie my head wraps (last seen here). So tada here it is! A little scarf wrap video.  I would love to see how you guys wear your wraps, shoot me an email or tag me on Insta  (@hellofashionblog) with your pics so I can see! 

Headband 4 Ways + Giveaway

Today I have teamed up with Lemons & Lace to offer a couple lucky readers a headband of their choice and some cute bows. I love wearing headbands especially when it's hot and I want to keep my hair out of my face. Today I am showing 4 easy ways to wear your favorite bands. 

1. Hair Down
 When I wear headbands with my hair down I put it on like a crown, so the band goes over my hair. I always off center the center of the band so the focal point (in this case the knot) is to the side and not dead center on my head. Do a mini part in the front and then brush your hair back for the last 3/4ths of your dome, it helps create volume. 

2. Messy Bun
I love a good top knot. Throwing a headband over to help keep fly aways from falling down gives it a good polished look. You can see my how to video on messy buns here

3. Low Bun
For this look, I  start with my hair down and brush it over my ears. Place the headband over your head (crown look again) and gather your hair in a messy bun on the opposite side of the center headband detail. I always pull a couple pieces out of the bun after to shape around my face so it looks loose and unfinished.

4. High Pony
I always put the headband on first when sporting a high pony. This look works better when your hair is a couple days unwashed and has that messy look. I never use a brush when I'm doing a messy pony. Gather your hair (bumps and all) and put in your elastic. Loosen the hair in between the headband and your pony then tighten the elastic again. This helps create bumps and gives it a raw look. 

Which way is your favorite? How else do you style your bands?

If you are still looking for the perfect Spring band, you can get this cute band from Lemon's and Lace here.  They are offering 15% off storewide for all Hello Fash readers so you can snatch a couple up for a good deal! Enter code: HELLOLEMONS at checkout.

Don't forget to enter the Giveaway! 


a Rafflecopter giveaway

Hair Tutorial: Loose Curls

I've had quite a few emails and comments asking how I get my loose, wavvy curls. 
(see full blog post of look below here)


Below is a quick tutorial showing you how I curl my hair from start to finish.
(The video shows up kind of small on the blog, but if you double click on the video and it will take you to the larger screen on youtube :)


Keys when Curling your Hair:
*Curl with clean hair
*Curl away from your face
*Don't curl all the way to the end
(leave 3-6 inches of straight hair, depending on your hair length)
*Brush through your curls


Hope this helps ladies! 
Happy Hair Doing!!

Hair Tutorial: Messy Bun

A couple weeks ago I asked you guys to send me your questions about fashion, clothes, hair, etc. I love interacting with my readers! I got quite a few inquiries about how I do my hair. 

Kayee wrote:
"I love how you do your hair in a bun like in your March 28 Pop That Collar Post. Could you share how you make your messy bun? It looks so perfect!"

Full post from "Pop that Collar" here

Click on the video below for my how to tutorial on a Messy Bun

(Click on the video to see in full screen)

A few tips when doing a Messy Bun:
* Don't do it with straight hair, it works better with a day old curl or wave
*Don't brush it smooth, part of a messy bun is the mess! :)
 (I like the look of bumps and loose volume)
*If your hair doesn't have any volume you can back comb it a bit before putting it in a bun
*It may take a couple time. Sometimes the first time I put it up its super lopsided or I missed a chunk of hair. Don't stress if it takes a couple times to look right


I will be answering more questions next week. Keep them coming :)
Email to hellofashion123[at]gmail.com
Related Posts Plugin for WordPress, Blogger...